Tuesday, November 19, 2013

Installing Oracle WebCenter Content 11g

In this blog I would like to briefly show the steps to install Oracle WebCenter Content 11g.  Oracle WebCenter 11g is based on Weblogic server now and they also need database schemas created just as other Oracle Fusion applications.

I will install them in my laptop with Windows 7 and use Oracle XE 10g as the database where the schemas reside. 

You can download Oracle XE, Weblogic 10.3.6 and RCU 11.1.1.7 from this url: http://www.oracle.com/technetwork/middleware/soasuite/downloads/index.html

You can download Oracle WebCenter Content from the url: http://www.oracle.com/technetwork/middleware/webcenter/content/downloads/index.html


Step 1: Install Weblogic 

If you already have Weblogic installed you can skip this step.

My laptop runs on Windows 7 64-bit so the download of Oracle Weblogic 10.3.6 is wls1036_generic.jar.  To start the installer just use the following command.

 java -jar wls1036_generic.jar


After the successful installation there is new folder as the below:


Step 2: Install database schemas using RCU 

My RCU download is ofm_rcu_win_11.1.1.7.0_32_disk1_1of1.zip.  Unzuip this file into the folder RCU and run the following command.  Here it is assumed that Oracle XE 10g is installed already. 

 set RCU_JDBC_TRIM_BLOCKS=TRUE 

 echo %RCU_JDBC_TRIM_BLOCKS% 

 cd RCU/rcuHome/BIN 

 rcu.bat 


After RCU installation is done, several schemas are created in Oracle XE. 


Step 3: Install Oracle WebCenter Content 11g

The download of WebCenter Content 11g are two zip files: ofm_wcc_generic_11.1.1.8.0_disk1_1of2.zip and ofm_wcc_generic_11.1.1.8.0_disk1_2of2.zip.
Unzip two files into the folders: Disk1 and Disk2.
Use the following command to 

cd C:\MyDownload\OracleWebCenter\Disk1 

setup -jreLoc C:\Java\jdk1.7.0_06


Oracle Middleware Home is: C:\Oracle\Middleware and Oracle Home Directory is: Oracle_ECM1.


After the installation there will be one Oracle_ECM1 folder created under Oracle Middleware.


Step 4: Create WebCenter Content Domain

In this step one domain for WebCenter Content will be created.   Use the following command to start Conifguration Wizard.


C:\Oracle\Middleware\Oracle_ECM1\common\bin\config.cmd

Choose the products: WebCenter Content and WebCenter Imaging.


The domain name is: ecm_domain.


User name: weblogic and password: welcome1


Change the schema owner name if they are not correct.


Create the cluster whose name is: WCC_Cluster.


Create the machine whose name is: LocalMachine.


Step 5: Start WebCenter Content 11g

Now WebCenter Content 11g can be started.
This command is used to start the Admin server.

C:\Oracle\Middleware\user_projects\domains\ecm_domain\bin\startWebLogic.cmd

These commands are used to start the managed  servers.

C:\Oracle\Middleware\user_projects\domains\ecm_domain\bin\startManagedWebLogic.cmd UCM_server1 http://localhost:7001
C:\Oracle\Middleware\user_projects\domains\ecm_domain\bin\startManagedWebLogic.cmd IPM_server1 http://localhost:7001
C:\Oracle\Middleware\user_projects\domains\ecm_domain\bin\startManagedWebLogic.cmd IBR_server1 http://localhost:7001


Friday, September 27, 2013

Apply Authorization Policy to SOA Composite

This blog demonstrates how to use Oracle authorization policy to restrict the access to one SOA composite in Oracle SOA 11g.
In this example SOA composite is consisted of a simple BPEL component which is exposed as Web service. 

In order to protect the SOA composite from unauthorized access Oracle policy oracle/binding_permission_authorization_policy need to be applied the service of the SOA composite.  This policy will ensure that the authenticated subject has the permission to access the resource specified in the policy.  In Oracle the application policy defines the resource to be protected, the permission class which is used to check the permission.  Here the permission class is: oracle.wsm.security.WSFunctionPermission.  The application policy also associates the resource with the application role, user or group. So the only authenticated subject which belongs to the application roles can will be granted to permission to the resource.

The authenticated subject is the entity that has been authenticated.  Thus before the authorization is applied the authentication is needed to apply first.  So the authentication policy oracle/wss_username_token_service_policy is also required.

The user and group are defined in Oracle Weblogic Admin Console and the application policy and application role are defined in Enterprise Manager.  The below diagram shows the the relationship:


Create the User and Group in Oracle Administrator Console
Login into Oracle Weblogic Administrator console.
Go to Security Realm->myrealm->Users and Groups->Users->New

Type in your user name and password and click on OK button.


Go to Security Realm->myrealm->Users and Groups->Groups->New

Type in your group and click on OK button.


Go to Security Realm->myrealm->Users and Groups->Users. Then click on the user: premium and then click on Group tab.


Select the group CustomerManager and add to chosen. 

Click on OK button.

Create the Application Role in Enterprise Manager console

Login into Oracle Enterprise Manager console
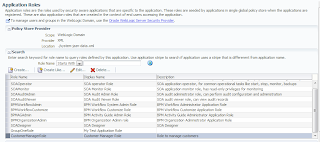
Go to Farm_soa_domain->SOA and then right click on soa-infra and choose Security->Application Roles.


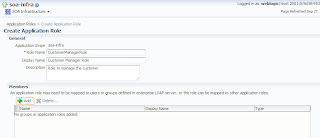
Click on Create... and then type in the group information.

In Members click Add...

Change the type as Group and then click Search button.   Select the group: CustomerManager which is defined in Admin Console.  Then click on OK button.


Click on Save button.


Create the Application Policy in Enterprise Manager console

Go to Farm_soa_domain->SOA and then right click on soa-infra and choose Security->Application Policies.


Click on Create... 


Click on Grantee->Add

Search Principal with type as Application Role and select the application role: CustomerManagerRole and then click on OK button.


Click on Permissions->Add

Click on Continue button.  Type in oracle.wsm.security.WSFunctionPermission in Permission Class.
and http://www.toic.com/customer/wsdl/UpdateCustomerService#update in Rescource Name and invoke in Permission Actions.


Click on Select button.


Click on OK button.


Add the policies to the service of SOA composite in JDeveloper

In JDeveloper right click on the service of the SOA composite and choose the menu item Configure WS Policies...


Click on add icon of Security to add 


Choose oracle/binding_permission_authorization_policy and then click on OK button.

Do the same to add the oracle/wss_username_token_service_policy.


Then click on OK button.  

Deploy the SOA composite to the SOA server.


Test the authorization using soapUI

The first message is the one with right user name and password: premium/welcome1 which is set up in Oracle Admin console.


<soapenv:Envelope xmlns:soapenv="http://schemas.xmlsoap.org/soap/envelope/" xmlns:cus="http://www.toic.com/customer">
   <soapenv:Header>
         <wsse:Security xmlns:wsse="http://docs.oasis-open.org/wss/2004/01/oasis-200401-wss-wssecurity-secext-1.0.xsd">
         <wsse:UsernameToken>
            <wsse:Username>premium</wsse:Username>
            <wsse:Password Type="http://docs.oasis-open.org/wss/2004/01/oasis-200401-wss-username-token-profile-1.0#PasswordText">welcome1</wsse:Password>
         </wsse:UsernameToken>
      </wsse:Security>
   </soapenv:Header>
   <soapenv:Body>
      <cus:UpdateCustomerRequest>
         <cus:CustomerID>1234567</cus:CustomerID>
      </cus:UpdateCustomerRequest>
   </soapenv:Body>
</soapenv:Envelope>
The SOA composite will be successfully invoked.  The response message comes back correctly without authorization error.

If the user name/password is changed to weblogic/welcome1 which is valid user set up in Oracle Weblogic Admin console.  But this user doesn't belong to the application role which has the permission to invoke the SOA composite in the policy. Now the response message shows that the authorization is not successful.
<env:Envelope xmlns:env="http://schemas.xmlsoap.org/soap/envelope/">
   <env:Header/>
   <env:Body>
      <env:Fault xmlns:ns0="http://docs.oasis-open.org/wss/2004/01/oasis-200401-wss-wssecurity-secext-1.0.xsd">
         <faultcode>ns0:FailedAuthorization</faultcode>
         <faultstring>FailedAuthorization : failure in authorization</faultstring>
         <faultactor/>
      </env:Fault>
   </env:Body>
</env:Envelope>